Spring Cleaning is Here! Organize and Declutter Your Home Today.
Maintaining a clean kitchen throughout the week is entirely achievable with routine attention. Two fundamental practices—managing dishes and cleaning countertops—are essential for maintaining order. Periodically, however, more comprehensive cleaning may be necessary. For ongoing care after each use:

Wash the stainless-steel inner pot. Place the stainless-steel insert in the dishwasher along with other dishes after each meal.
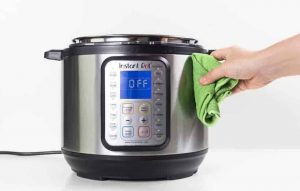
Wipe down the housing unit. Clean the exterior and interior of the cooker with a damp cloth.
Clean the sealing ring. Remove the silicone sealing ring from inside the lid and wash it by hand or on the top rack of a dishwasher.
Wipe the inside of the lid. Remember to wipe the inside of the lid, as it can accumulate grime over time; use a damp cloth for best results.
Deep Cleaning an Instant Pot (Every Few Weeks)
To maintain the Instant Pot and minimize clogs, residue buildup, and odors, conduct periodic deep cleaning as described below:
Unplug the appliance.
Disconnect the Instant Pot from its power source before cleaning for safety. Use a clean, damp cloth to wipe the interior and exterior of the housing unit that contains electrical components. A small brush can assist in removing food residue from hard-to-reach areas at the bottom of the unit. The lid should be washed by hand with warm, soapy water, or placed on the top rack of the dishwasher after all small parts are removed.
Inspect and clean the small parts around the steam valve, which may become blocked by food debris. Remove the Quick Release handle by pulling it straight up, wash it with warm soapy water, and replace it. Next, remove the shield covering the steam release valve inside the lid—this component may either screw or pop off depending on the model. Clean and replace the shield. Also, wash and reinstall the condensation collection cup attached to the Instant Pot’s side.
Remove and inspect the silicone ring beneath the lid for damage and replace it if necessary. Wash the ring either on the dishwasher’s top rack or use a steam-cleaning method to address any retained odors. (See “How to Deodorize an Instant Pot Sealing Ring” below for details.)
After cleaning, confirm the ring is properly seated in the lid. Wash the stainless-steel inner pot, steam rack, and other frequently used accessories. Both the inner pot and steam rack are dishwasher safe, check labels on supplemental accessories before dishwashing. Reassemble all parts, including the sealing ring, valve shield, and Quick Release handle, ensuring none are missing. 
Silicone rings that retain odor may be deodorized via steam cleaning with vinegar. Add 1 cup of water, 1 cup of vinegar, and several lemon peels to the inner pot. Select the “Steam” setting and set the timer for 2 minutes. Allow natural pressure release. Once the lid unlocks, remove the sealing ring and dry. Vinegar and lemon peel oils can help neutralize odors but note that silicone sealing rings will require periodic replacement due to normal wear.
How To Deodorize an Instant Pot Sealing Ring
Steam cleaning can be used to sanitize the inside of the pot and lid, as well as other heat-safe objects that fit within the unit.
If the Instant Pot lid’s silicone sealing ring has absorbed food odors, deodorization can be performed by steam cleaning the ring with vinegar. Place 1 cup of water, 1 cup of vinegar, and a few lemon peels in the inner pot, select the “Steam” setting, and set a timer for 2 minutes.
Allow natural pressure release, then once the lid can be opened, remove the sealing ring from the lid and let it air dry. The combination of vinegar and lemon peel oils assists in neutralizing odors trapped in the silicone ring. Over time, silicone rings may still need replacement due to wear.